Table of Contents
For technical support, please contact WebEx Technical Support: 1 (866) 229-3239. They are available 24/7. If you have a McMaster specific question you can contact us at support.webconf@cll.mcmaster.ca
How to join a session
- You will be sent an email with session information such as date, time, and who initiated the session. Alternately, your instructor may post this information in Avenue to Learn’s Announcements for the course, or in Content.
- Click the link in the email to go to the WebEx website.
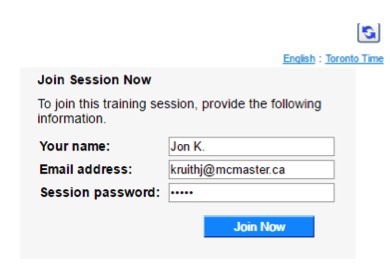
- On the right hand side of the screen, you will see an area to log in. Type your name (e.g., John D.) and your email address and press “Join.” Please note that you are not creating an account, just joining a session. Quite often, the password will be autofilled into the password field, if not you will have to type in the password as well.
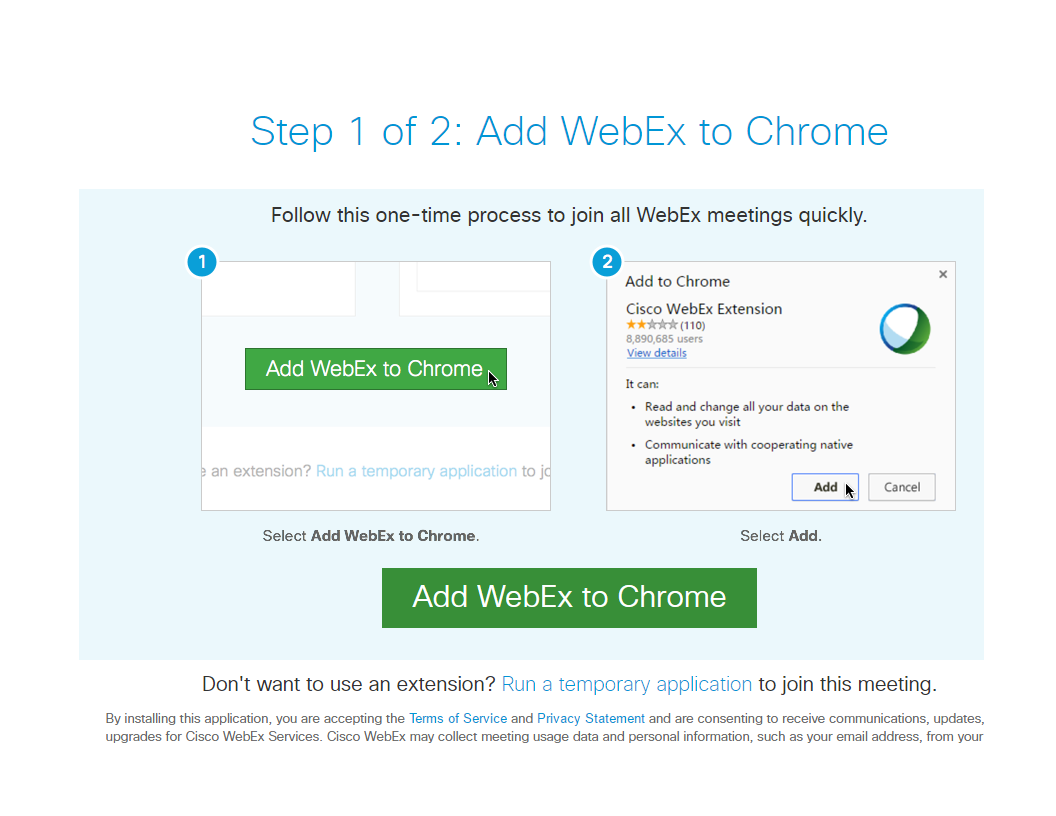
- The very first time you may be prompted to download the WebEx helper (on a Mac computer) or install an add-on for your browser (on a Windows computer). Depending on the browser (Edge, Internet Explorer, Firefox, Safari, Chrome) you are using the process may look a little different, as the steps below are illustrated for a Windows 10 operating system running Google Chrome. Click the green Add WebEx to Chrome and follow the on scree instructions. Alternately, if you do not have the ability to install or change your system, you can click the blue “Run a temporary application” link to begin the session.
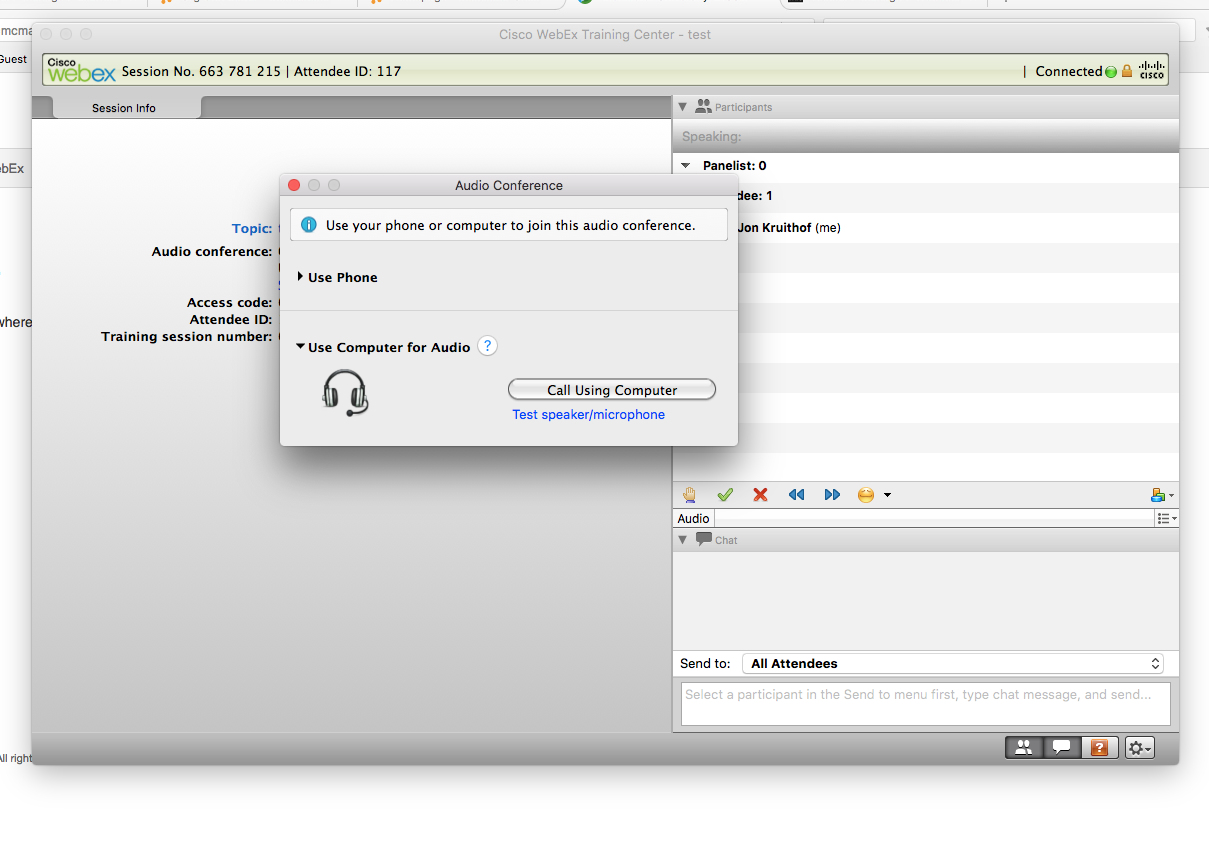
- Once the session has started, a separate window will pop up and prompt you for your choice of audio. You may either use a phone or your computer for audio. We strongly suggest that you have a headset with microphone for best results, and to select “Call Using Computer”. The system will begin to automatically try to connect your microphone and speakers to the session. Allow it to complete the setup. Once it has finished you should end up in the WebEx session.
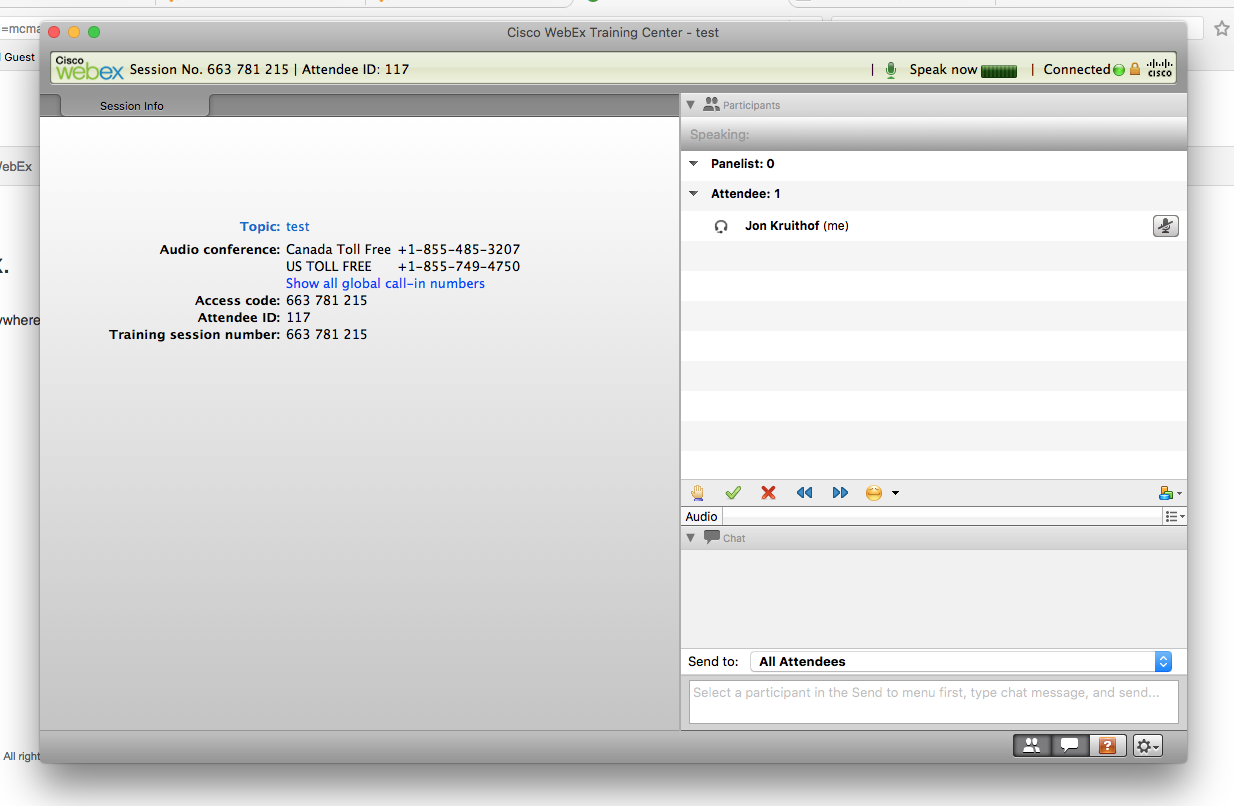
- When you enter the session it should appear similar to the image below. On the left side is where the whiteboard, session info and any other shared items will appear, including PowerPoint Presentations. On the right hand side of the screen is the participant window at the top, where you can see a list of all people attending the session and the chat window at the bottom, where you can enter a text question during a session.
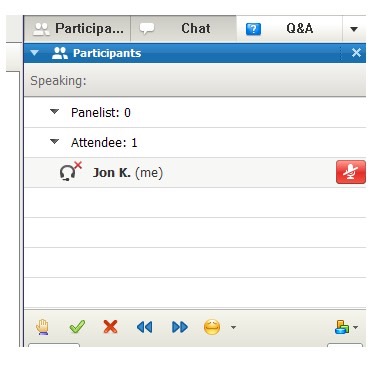
- To raise your hand, use the hand icon at the bottom of the participant window. You will also notice the checkmark and x icons, as well as other emoticons to provide feedback when asked for by the presenter. You also will have to lower your own hand when you are finished asking questions.
- If when you enter the session, your microphone is typically enabled. To mute your microphone, you can simply click the microphone icon next to your name and it will turn red as indicated in the image to the left. Remember, if you are called on to speak, you will have to turn on your microphone, or the instructor or facilitator can turn on your microphone for you. It is a good idea to keep your microphone muted not only for your benefit, but for the rest of the attendees.
Issues joining a session
If you have issues joining your session, you might be running into a bug we have discovered. If you click on the link that your instructor has sent you to join the session, and it redirects you to a MacMail/Outlook login page, please go back to the link and copy-paste it into your browser instead of clicking on the link. If the copy-paste does not work, first copy-paste your link into a text tool such as Notepad that strips formatting, then copy-paste the link that is now in Notepad and put it in a browser. It should now direct you to the correct session link.
Please note: Students DO NOT have WebEx accounts. Students join the sessions by going to the link provided by the instructor.
Videos on how to join a session and set up your audio from another institution: https://www.youtube.com/watch?v=qsNFysWHrcA&list=PL9o9I_doPQBK9-EVkgpZNE3dEld5FK7m6
