This is an old revision of the document!
Table of Contents

Avenue Fundamentals
Welcome to the Fundamentals of Avenue to Learn workshop. This is a blended workshop - meaning that before you attend the in-person session, you will have viewed the resources on this page, tried some of these tasks in a course shell and then attended our face-to-face working session where you will put what you've learned into practice. We strongly encourage you to bring materials that you might use for your course to the session, that way you will be able to use that time for developing your actual course. If you do not have all your materials prepared, that's fine, bring what you can to the session. The outcomes for this course are:
- You will be able to login to Avenue to Learn.
- You will be able to add files to, or create, Content for students to access in an accessible format.
- You will be able to use the Classlist tool to see who is in your course and manage enrollments.
- You will be able to use the Avenue Mail function and know the differences between Avenue Mail and McMaster e-mail.
- You will be able to use the Discussions tool, create a forum, and create a topic.
Basics
In order to get started with Avenue to Learn, you will need to complete the following steps:
1. Activate your MacID and enable your macid services
Macid's are created and maintained by University Technology Services. For all macid questions, go here: https://www.mcmaster.ca/uts/macid/ If you do not have a MacID, please contact UTS at uts@mcmaster.ca or by phone at 905-525-9140 x24357. Typically new accounts come over from UTS to Avenue to Learn within 24-48 business hours. If you have access to your McMaster e-mail or other McMaster services that use your MacID to login, but not Avenue to Learn, try logging in to Avenue to Learn and that should begin the self registration process to enable your account in Avenue to Learn (accounts get automatically processed nightly). If you get stuck, contact us directly at: Avenue support (available from Monday to Friday, 8:30 AM to 4:30 PM) at (905) 525-9140 ext. 23757 or by completing the intake form located at http://avenue.mcmaster.ca/support/
2. Login.
Login to Avenue with your MacID and password at http://avenue.mcmaster.ca/.

You should see a course in your Homepage view, shown below:
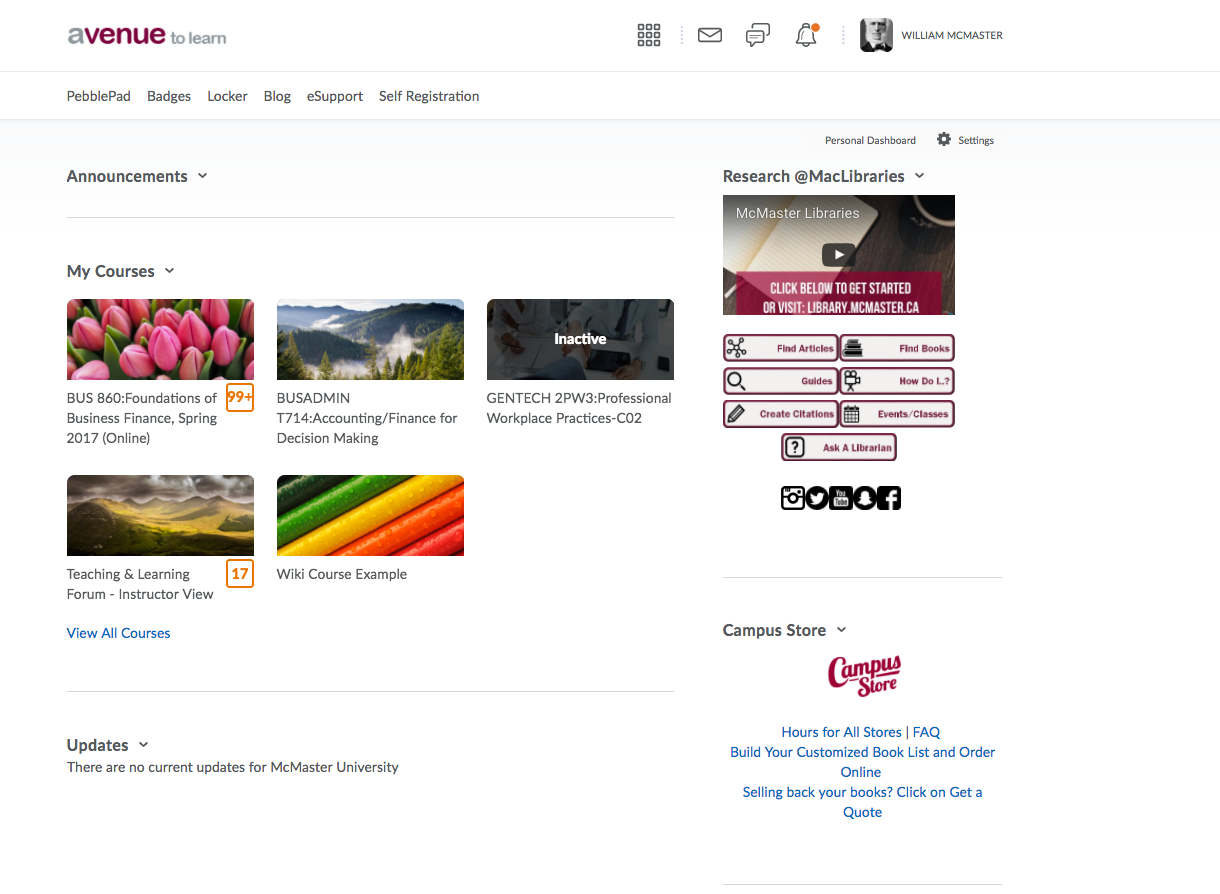
Content
Watch these video's from our vendor, for a beginner's dive into the Content tool:
The above are the basics that you should know. For an expanded dive into the content tool, there is a content playlist from the vendor at:
https://bit.ly/2H83KN5
Avenue to Learn is currently configured to provide users with an email account that they can use to send and receive emails from other users in the system. Users can also receive emails from external email accounts. Some departments on campus require all communication to be conducted through your @mcmaster.ca email account. In some cases, faculty have used Avenue Mail as a way of separating their teaching email from their academic or research email. Whether you use Avenue Mail or your McMaster email, you should make it explicit to students where you are checking your email and a rough turnaround time for a response. Additionally, you can help manage email by communicating through other channels such as Announcements. The benefit of using Announcements over Avenue Mail is that students can set notifications for Announcements items in courses, which will relay the message you post in Announcements to an e-mail account of their choosing, or as a text message.
Using the Mail tool: https://documentation.brightspace.com/EN/semester_start/-/instructor/faq_email.htm
You do not have to use the Avenue Mail tool to send email within the system, you can also use the Classlist tool, located under Communications > Classlist, which allows you to send an internal to Avenue email to the entire class in a way that is quicker and easier than using the Avenue Mail tool.
If you choose to use Avenue Mail for communication with your students, some other helpful PDF resources for yourself and your students to manage Avenue Mail are listed here:
Classlist
The Classlist tool allows you to see your entire class roster, complete with MacID and student number. When you make a course request for a course shell, what you are doing is connecting the course on Avenue to the records of the Registrar's office. Enrollments are managed automatically, and often do not require you to intervene. However, there are times when the information from the Registrar's office and Mosaic lag and students do not see their courses in a timely manner. There are many reasons why a student may not be legitimately enrolled in the course, including payment of fees not being complete, scheduling conflicts that require manual intervention, and Ironically, if you want a spreadsheet list of your students, it's best to use the Grades tool, and export a spreadsheet with first, last, Org Defined ID (which is the student number) and Username (which is the user's MacID).
In the video below, there is some useful information about the Classlilst tool and how to contact your learners:
How to Add a Participant to Your Course:
For more information on the classlist tool: Classlist
Announcements
This tool is one of the most effective in communicating with your students as it is the first thing they see once they access your course. You can provide announcements, course updates and important information through this tool.
How to create an announcement item: https://documentation.brightspace.com/EN/le/announcements/instructor/create_announcements_item.htm
Discussions
Online discussions are a flexible instructional tool that can help you build a community in fully online courses, can provide peer support and peer marking, or simply can provide a place where students can discuss issues related to the class. As always, when you have a tool that can do many things, it can be overwhelming for both the instructor and the student or learner. When setting up Discussions in Avenue to Learn, you should be able to answer the following questions before starting:
- What are students going to do with this discussion area?
- What outcome do I hope to achieve with this discussion?
- How much is discussion going to be worth (if any grades are assigned at all)?
- Who is going to monitor the discussion board?
- Will I allow anonymous posting?
For more information about designing discussions, please visit the following link:
University of Pittsburgh's Online Discussions Best Practices
The Disucssions tool is located within your course, under the Communication menu (Communication > Discussions).
Creating a Forum
1. To create a Forum, or organizer for the discussion, first go into the Discussions tool within the course you wish to create a new Forum. Then click the blue, New button, and select New Forum. The only required field in creating a Forum is the title, so enter a title. If you only are having one discussion Topic within this Forum, you can select the “Create a new topic in this forum with the same title” checkbox to save yourself a step. Underneath the description are three options that are worthy of consideration.
Anonymous posting is truly anonymous. Even Administrators cannot see who has posted. While Instructors could cross reference information under User Progress (Edit Course > User Progress), to identify who was in the course at the time of the post, it does not provide a definitive, conclusive answer. Instructors who teach in topics that are personal, sensitive, or deal with issues that could be seen as difficult, you may want to consider making a discussion forum anonymous. The student has to opt-in to appearing as anonymous, and it goes without saying that if you are marking discussions, you may find it difficult to assess grades for anonymous posts.
Moderator Approval holds all posts for someone with Moderator privileges (Instructor and TA1 roles) to approve the post. While this may work in mid sized classes to help manage overloading of posts, large scale classes with required discussions do not tend to be effective with this technique.
The Users Must Start a Thread option requires the student to post first before they can see any of the other posts in the Topics underneath this Forum. Typically we suggest that you do not select this option here, as it is better to check it at the Topic level, which is where it would typically be applied.
As we move further down the page, Availability refers to when the Forum will be available to be seen. If you are using one discussion Forum to hold multiple Topics, you should set the Availability to shortly after the course begins. That way, students will be able to post as soon as appropriate. You can also set Availability on Topics, so you can choose to open the Forum early and dole out Topics as they become needed.
Locking refers to whether or not a person can post a thread to a Topic. Again, most people do not use locking as a mechanism as students are busy and don't tend to continue discussion beyond what is required in the course. However, there are times where you would like discussion to occur within a specific period of time, but still be available for review later. In a situation like that, you may want to apply locking. Either way, you are unlikely to want to lock an entire Forum, rather you would be better to consider locking or unlocking Topics.
For more information about creating Forums, or to visually see the steps described, please watch the embedded video below.
2. When finished, click Save and Add Topic.
Creating a Topic
3. (OPTIONAL) If you have not clicked Save and Add Topic above in step 2, or wish to add a new Topic to an existing Forum, enter the Discussions tool in your course (Communication > Discussion). Click the blue New button, and then select New Topic. You will be required to situate the Topic in an existing Forum.
4.The options for creating a Topic are similar to that of the Forum, with one exception. Topics can be rated. Rating a Topic is done by students in a course, and can show approval, value or benefit of a post. Using the ratings options for a Topic can create a simple peer evaluation process, where students can add rankings or vote up valuable responses.
For more information about creating Topics, or to visually see the steps described, please watch the embedded video below.
For more information about creating forums and topics, please see the following links:
Configuring Discussions
There are two different ways to look at Discussions, Reading View, which is the default view, and Grid View. To enable Grid View, follow the steps described in the video below.
Moderating and Assessing Discussions
If you are using Discussions as an assessment method, you will need to consider how you are going to mark learners responses. Are you going to value frequency of posting, quality of posting, quantity of posting or use a rubric based on all of these ideas?
Grade a Topic (not needed for the workshop, but good to know)
For questions or concerns, Avenue support is available from Monday to Friday, 8:30 AM to 4:30 PM at (905) 525-9140 ext. 23757 or email support.avenue@cll.mcmaster.ca.