This is an old revision of the document!
Table of Contents
Classlist
Vendor Documentation
Following documentation are provided by original vendor.
- Email learners in the Classlist
https://documentation.brightspace.com/EN/semester_start/-/instructor/email_learners_in_le.htm
- Check user progress
https://documentation.brightspace.com/EN/le/classlist/instructor/check_user_progress.htm
- User Progress overview
https://documentation.brightspace.com/EN/le/user_progress/all/user_progress_overview.htm
Avenue Specifics
-
Add Users To A Course
During Add/Drop Period, Avenue processes registration information once a day, with the information coming from the Registrar’s Office. This process can take as much as five business days for the changes to be reflected on Avenue. It is possible that a student might need to access the course sooner than the registration can be processed. When asked, it is up to the instructor of the course if they want to enrol students. If they do, they can do this through the Classlist tool on Avenue. To add a user to a course, enter the course and use the following steps:
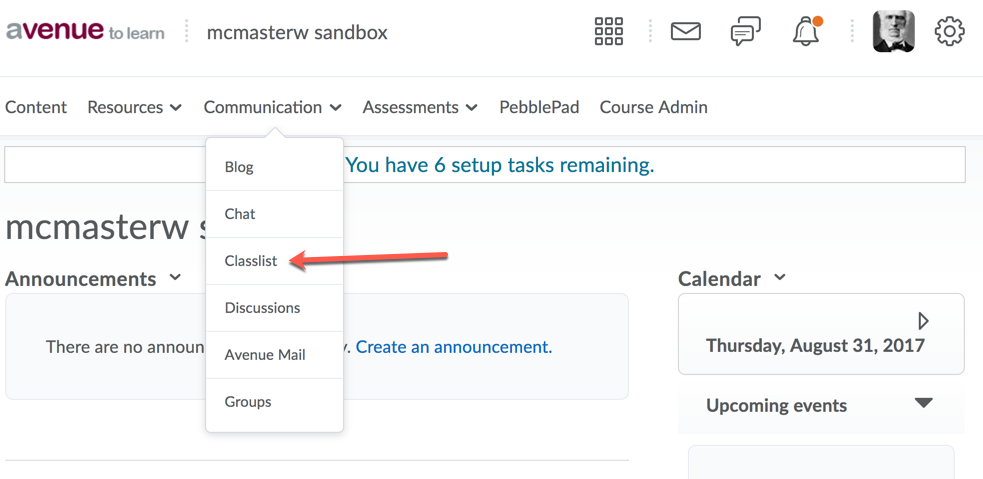
Under the Communication drop down menu, go to Classlist :
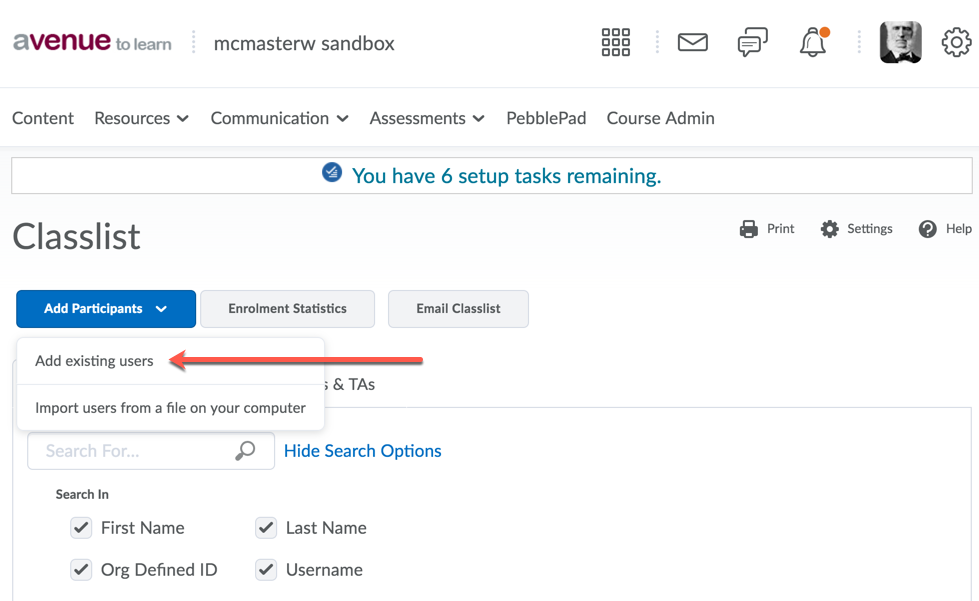
Go to the Add Participant drop down menu and click Add Existing Users:
Under Add Existing Participant, search for the user by MacID or first or last name by typing the ID or name in the search box (next to Search For) and click the search button (the magnifying glass icon). You can also search by student number (which is the Org Defined Id on Avenue).
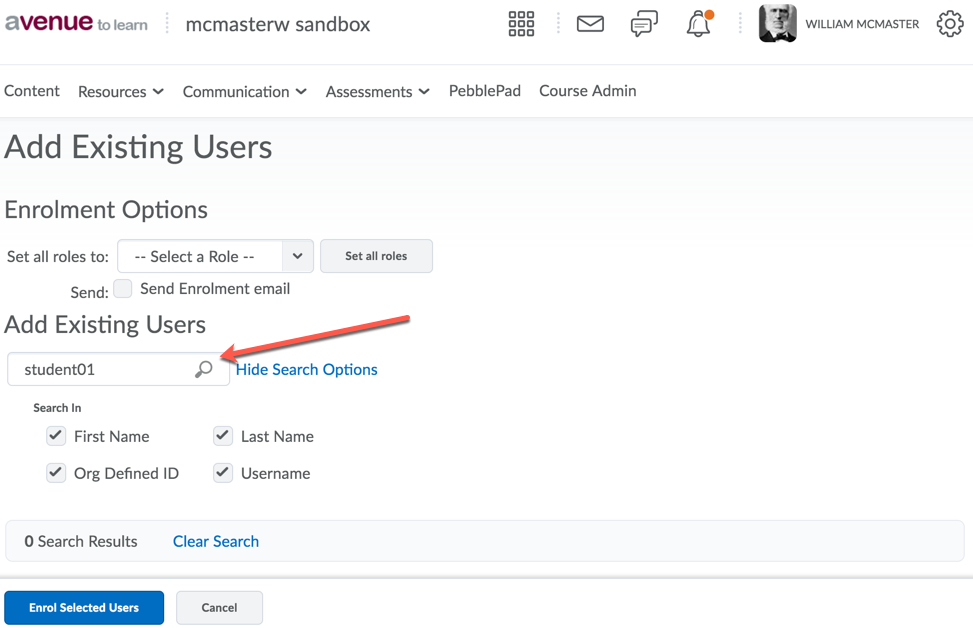
Set the role to either Student, any of the TA roles or Instructor. If you have access to other roles, be sure to use the other roles carefully and ensure that you are aware of what the role’s capability is. If you are unsure of what each role is capable of, please see the section “Default Access By Role”.
When you are ready to enrol the user, select the user you wish to add by clicking the box next to their name. Click the Enroll Selected User button at the bottom of the page to enroll the student.
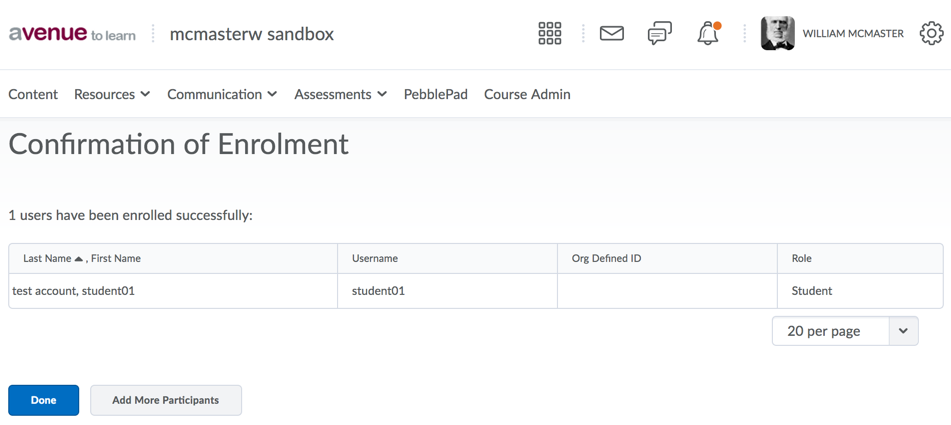
The last screen is a confirmation of changes to the course enrolment. To finish the process, click Done.
Adding Students Using a Spreadsheet
To add students using a spreadsheet, you will need to go to your Classlist tool and click on Add Participants and then on Import users from a file on your computer. Click on Browse, select the csv file to upload and then click on Import. This will take you to a Confirmation of Enrollment screen, where you will see the list of errors encountered. If there are no errors, simply click Done. If there were a few errors, note down the line number for the error so that you can compare it to your csv file and note down the students that have not been enrolled. You then have two options: fix the error in the csv file or manually add those students to the course using the method above.
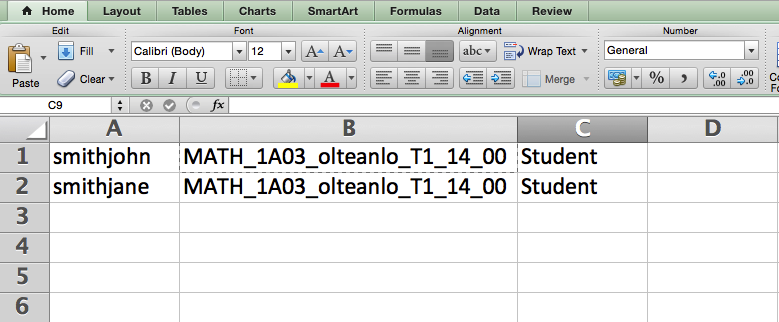
Here is what your csv needs to include, in separate columns and in this order:
- Macid
- Section
- Role (Student)
Note: to get the section for your course, go into Course Admin, Course Offering Information and then copy the code from the Course Offering Code. Paste that into the Section column in your csv and follow it by _00. For example, if your course offering code is MATH_1A03_olteanlo_T1_14, you will type in MATH_1A03_olteanlo_T1_14_00 for your section for all entries.
Here is an example of how your spreadsheet should look like:
Changing a Role in a Course
After enrolments occur, you may need to change the enrolment for a member of the course. For instance the requester for the course may have set a co-teacher as a Course Developer, but really the faculty member should be enrolled as an Instructor. Or it is possible that your TA’s were enrolled as TA4, but need to be TA1. This document will show you how to change the role of a person who is already enrolled in a course. To change the role of a user in the course, enter the course and use the following steps:
Click on the Communication drop down menu and go to Classlist:

In the Classlist, select checkbox next to the person or people you wish to change enrolment.
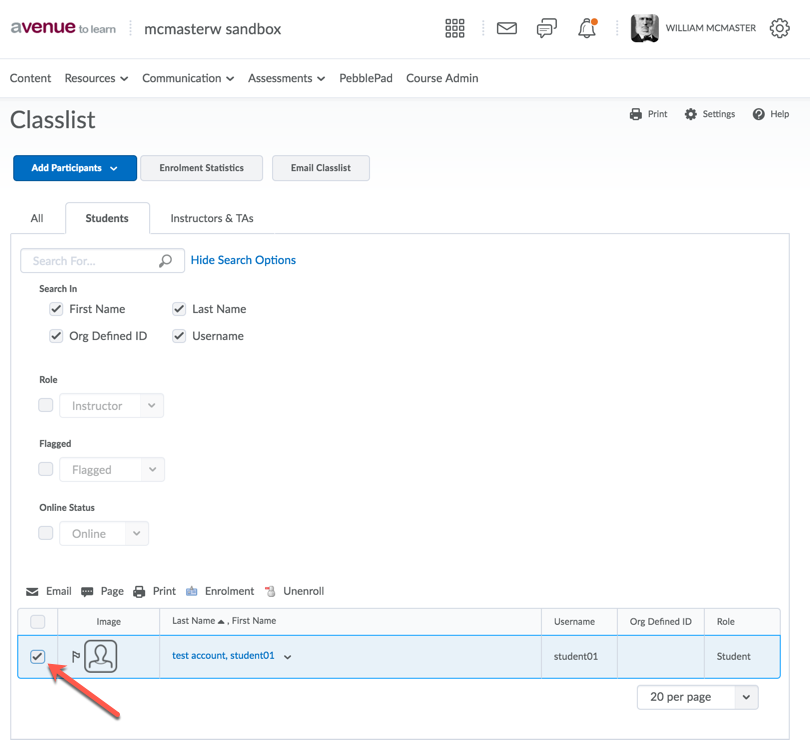
At the top of the Classlist are five icons. Click on Enrolment:

For each of the individuals selected, choose which role you wish them to be assigned:
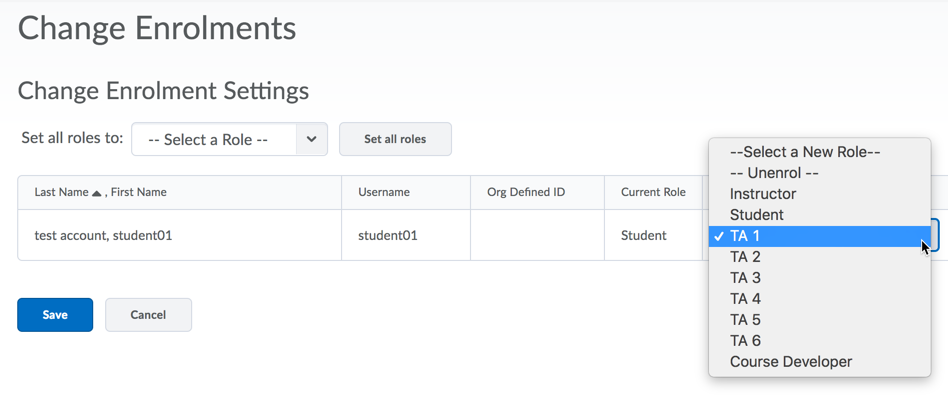
Click Save to make the changes and finish.
Avenue to Learn Role List
How do I remove a user from the classlist?
http://avenue.mcmaster.ca/help/docs/remove_user_from_class.pdf
Effective Pedagogical Practices
Please let us know if you have any pedagogical input for this tool.
For questions or concerns, Avenue support is available from Monday to Friday, 8:30 AM to 4:30 PM at (905) 525-9140 ext. 23757 or by completing the intake form located at http://avenue.mcmaster.ca/support/

