Table of Contents
Changing Image Size
Sometimes, you may find that you need to change the dimensions of an image to better fit within your portfolio. To resize an image, you can use photo editing software, such as Pixlr (free) or Photoshop. The process is generally the same for both.
Using Pixlr
1. When starting a new Pixlr project, choose to open an image from your computer and find the desired image. The image will open in a window within the editor.
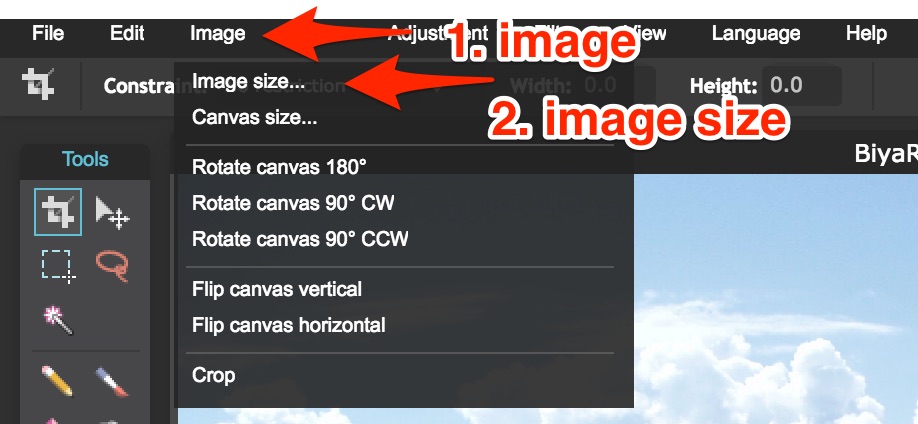
2. To change the image size or dimensions, go to “Image > Image size” from the toolbar at the top of the screen 1).
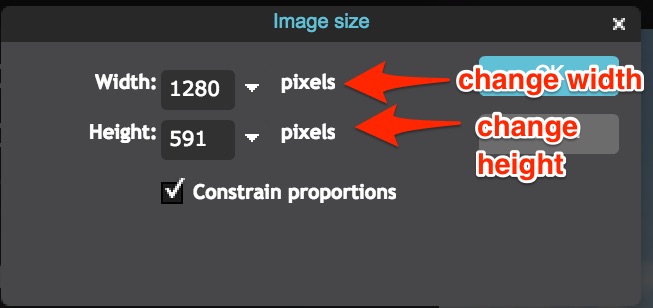
3. You can now change the dimensions of an image. If you are using an image as a banner in your portfolio, it is recommended that you set a width of 1280 pixels. To change the dimensions, simply click on the current width or height and write your desired value. Make sure that the option “Constrain proportions” is selected at the bottom of the menu. This will prevent any stretching or distortion when you change the image size.
4. Press “OK” to finish and change the size of the image.
Using Photoshop CC
1. Start a new Photoshop project. Go to “File > Open” and select the desired image. It will open in a window within the editor.
2. Go to “Image > Image Size” in the toolbar at the top of the screen.
3. You can now change the dimensions of an image. If you are using an image as a banner in your portfolio, it is recommended that you set a width of 1280 pixels. To change the dimensions, simply click on the current width or height and write your desired value.
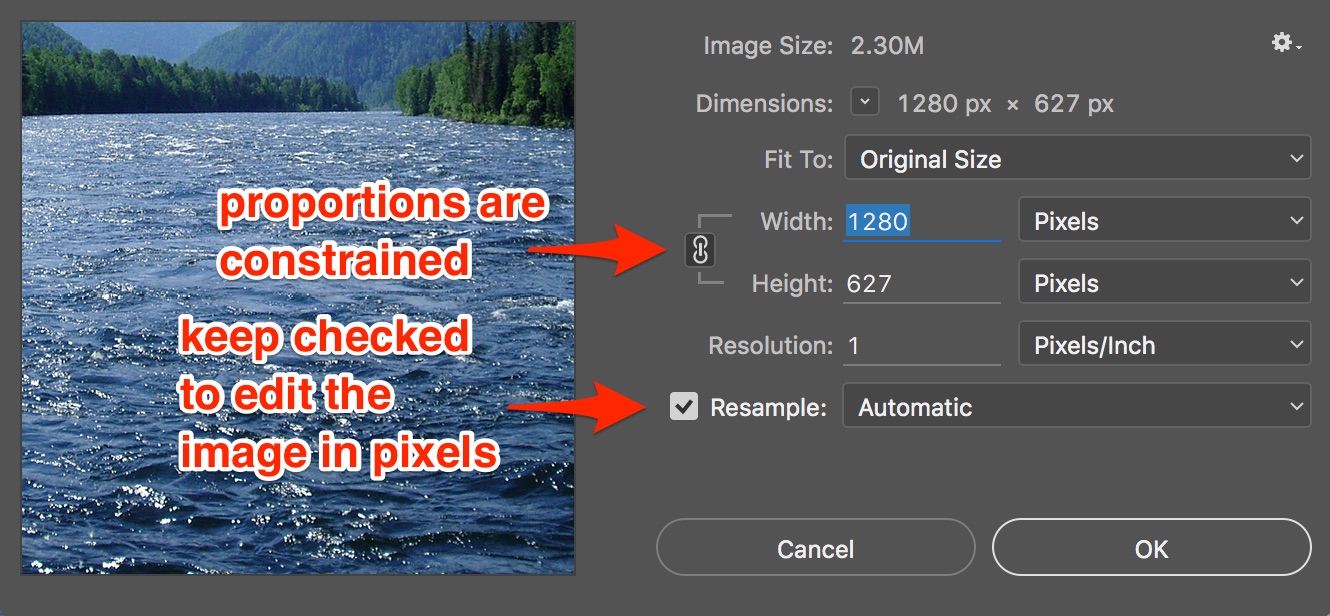
4. To edit the dimensions of the image in terms of pixels, select any option from the “Fit To” dropdown in the Image Size menu. Make sure that the option “Resample” is selected at the bottom of the menu and set to “Automatic” 2); this will allow you to edit the image size in terms of pixels. When you start changing the size of the image, the proportions should be constrained.
5. Press “OK” to finish and change the size of the image.
Using Photoshop Elements
1. Open the Photo Editor in Elements to start a new project.
2. Go to “File > Open” and select the desired image. It will open in a window within the editor.
3. To change its size, go to “Image > Resize > Image Size” in the toolbar at the top of the screen.
You can now change the dimensions of an image. If you are using an image as a banner in your portfolio, it is recommended that you set a width of 1280 pixels.
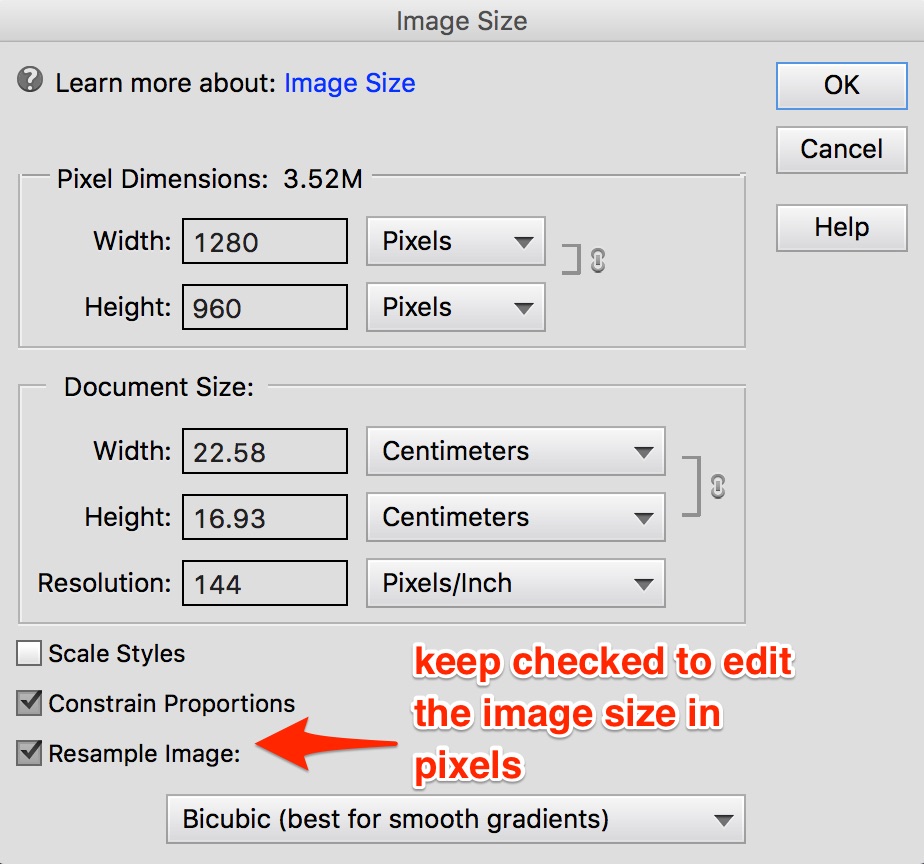
4. To change the dimensions, simply click on the current width or height and write your desired value. To edit the dimensions of the image in terms of pixels, select any option from the “Fit To” dropdown in the Image Size menu. Make sure that the option “Resample” is selected at the bottom of the menu and set to “Automatic”3); this will allow you to edit the image size in terms of pixels. When you start changing the size of the image, the proportions should be constrained.
5 Press “OK” to finish and change the size of the image.


